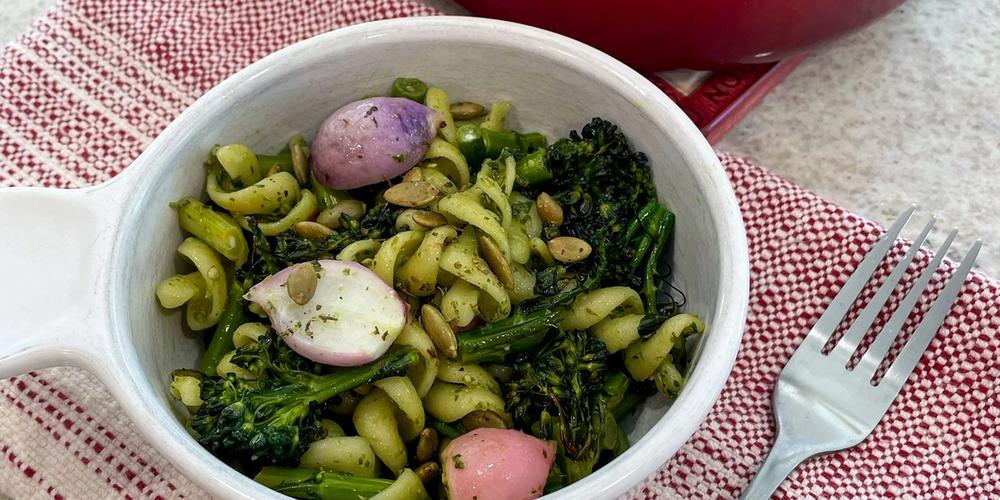
Delightful Roasted Radish & Broccoli Pesto Pasta Salad

Is your local weather struggling to decide between winter and spring? This month, we have a versatile pesto pasta recipe for you that makes the most of reliable winter greens and other vegetables that flourish into spring. Enjoy it warm with a protein for a satisfying dinner, or chilled on its own for a refreshing lunch.

Pesto Dressing
Let’s begin with the pesto dressing for this pesto pasta salad. I adapted this recipe from an online find—a great version of a favorite from a Taos restaurant. This recipe yields more than you’ll need for the pasta, providing a bonus of leftovers perfect for bruschetta, pizza sauce, or simple salad dressing. It’s excellent made ahead and will keep for at least a month in the refrigerator, mellowing and darkening over time. A key feature of this pesto is that it’s nut-free, making it a good choice for those with allergies.

Pesto Ingredients
- ¾ to 1 cup (or more) fresh basil leaves
- ½ Tbsp. thyme
- ½ Tbsp. oregano
- Pinch of dried parsley or carrot tops
- ⅛ tsp. white pepper
- 1 Tbsp. or 2-3 cloves of garlic
- ⅛ cup soy sauce (add more to taste)
- ¼ cup plus a splash of red wine vinegar
- Squeeze of lime or lemon juice
- 1 cup oil (see Substitutions below)
- ½ cup parmesan cheese
How to Make the Dressing
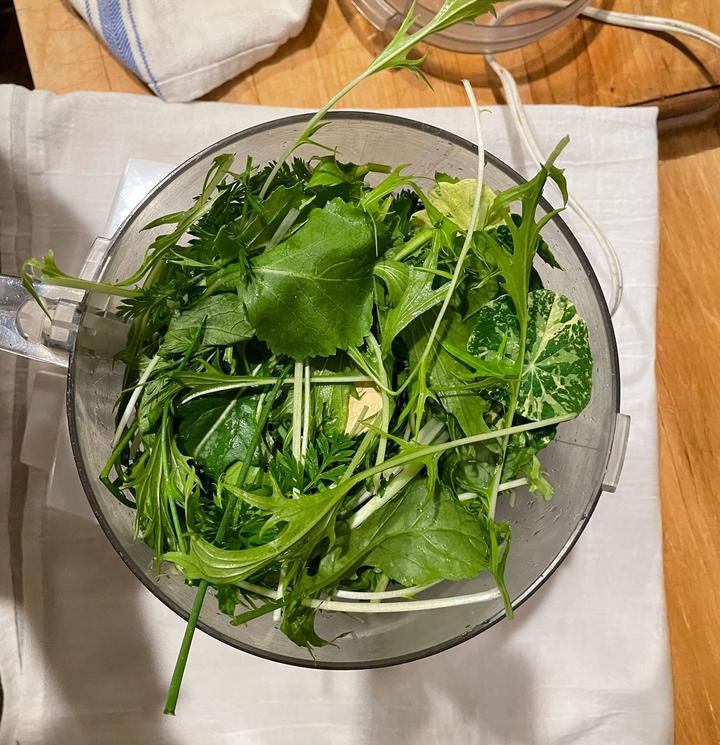
- Process Greens: Thoroughly rinse and dry the basil leaves or other greens, then blend them in a food processor or blender. Scrape down the sides as needed; it’s hard to over-process at this stage.
- Add Seasonings: Incorporate the remaining herbs, seasoning, soy sauce, vinegar, lemon juice, and garlic. I often use a garlic press for better blending, but thawed, peeled whole heads of undeveloped garlic (pre-frozen) melted into the batch I made. Blend again. Now is a good time to taste and adjust the vinegar or soy sauce. It should taste like it needs salt, which the parmesan will provide, so hold back on adding too much extra soy sauce/shoyu for now.
- Emulsify with Oil: While the blades are running, open the fill cap and quickly pour in the oil. Be careful of splatter! The pesto will lighten in color and begin to emulsify.
- Add Cheese: Add the parmesan and pulse just until combined. Over-blending here can generate heat and melt the cheese, which should be avoided.
- Final Adjustments: Taste and adjust the seasonings as desired. This recipe makes approximately one pint of dressing.


Substitutions and Variations
I enjoy customizing recipes based on what’s available. Here are some ways to change up this recipe:
Greens
To combat the “winter blahs,” I used a diverse mix of greens from our campus domes (the “dome-shopping-network”). For this version, I heavily relied on radish leaves and carrot tops, along with nasturtium leaves, mizuna, chives, and a touch of wasabi arugula. Spinach or tender broccoli leaves would also work. Ensure all woody stems are removed before blending.

I was prepared to add honey if the mix was too bitter or spicy, but I was happily surprised to find the mizuna and groundhog radish leaves tasted sweet on their own.

I still included a generous portion of store-bought basil, as basil is too tender for our unheated domes during single-digit nights. I think the pesto would have been tasty even without this addition. For a simple, spicy pesto, you can also try our recipe for nasturtium pesto.
Make It Vegan
To make this dressing vegan, simply substitute the Parmesan cheese with a vegan cheese alternative, or use nuts like cashews or the traditional pine nuts. If using whole nuts, you’ll want to process them first, before even the greens. Remove them from the processor so they don’t turn into butter, and add them back in the final step, where you would add the cheese.
Choose Your Oil
I use canola oil because I believe it’s what the original restaurant recipe uses; it has a neutral flavor and won’t solidify when refrigerated. If you substitute olive oil, remember to bring the dressing to room temperature before serving to restore its liquid consistency. I prefer using only one cup of oil for a thicker consistency, unlike the original online recipe, which called for two cups.
Vinegar Options
Red wine vinegar is my default choice as I find it milder than apple cider or white vinegar. Champagne vinegar would offer a premium flavor boost. For this specific batch, I replaced about ⅛ cup with fire cider (from last month’s recipes from the garden).
Spice It Up!
Instead of adding thyme and oregano separately, I used two big pinches of a homemade Italian blend (dried marjoram, oregano, basil, thyme, and rosemary). I also added a bit of black pepper.
For heat, I tossed in about half a teaspoon of red pepper flakes. I’ve been drying my own from last summer’s harvest:
- Seeds: I save and dry seeds from roasted green chiles and raw jalapeños.
- Whole Pods: Thai chiles and cayenne peppers are dried whole.
- Buena Mulata: These dry better when chopped first and are kept separate for easier heat control.
Pepitas (Salt & Pepper Roasted Pumpkin Seeds)
Pepitas, the Spanish-Mexican term for pumpkin seeds (pepita de calabaza means “little seed of squash”), are found in winter squash. For this recipe, I used bulk pumpkin seeds with the white husk removed. Roasting them simply with salt and pepper adds the characteristic nuttiness of pesto and boosts this pesto pasta salad’s protein content. I often roast small batches with various flavors, such as a candied version or a spicy paprika/chile powder blend.
Ingredients
- 1 cup pepitas
- ½ Tbsp olive oil
- ½ tsp of salt
- ¼ tsp pepper
Roasting Instructions
- Preheat oven to 350ºF.
- Toss all ingredients together to coat.
- Spread the seasoned pepitas on a baking sheet, preferably lined with parchment.
- Roast for approximately 10-15 minutes, stirring halfway through. They should look toasted and lightly browned.
- Remove and allow to cool completely.

Cooled pepitas can be stored in an airtight container in a cool pantry for several weeks and used as a topping for soups, salads, or avocado toast.
Roasted Radishes & Broccoli

I used tender broccolini for minimal prep, but if using mature broccoli, you may need to peel and chop the stems. Rinse and drain the vegetables. Chop the broccoli and radishes to salad-friendly sizes (halving or quartering the radishes depending on size). I suggest a mild variety like a breakfast radish; Pink Beauties from our 33′ dome is what I used for this recipe. Approximately one dozen radishes and broccolini stalks (or one large broccoli head) are recommended.
Toss the vegetables lightly with olive oil, salt, and pepper. Roast in a preheated 400ºF oven for about 20–30 minutes, stirring once halfway through. They should be fork-tender with browned edges. After removing them from the oven, toss them immediately with a little squeeze of lemon juice. These roasted veggies are a perfect side on their own if you are watching the carbs and aren’t feeling the pasta salad vibe.
Assemble the Pesto Pasta Salad
If you’ve made it this far, here comes the main attraction! The dressing and pepitas can be prepared days ahead, so the final assembly of the pesto pasta is fast.
Ingredients for the Final Salad
- Roasted radishes and broccoli
- Approx. ½ pound of cooked pasta (for 4 servings)
- ¼ cup (plus more) of pesto dressing
- ⅛–¼ cup roasted pepitas

Use fusilli (my choice) or any macaroni suitable for pasta salad (farfalle, elbow macaroni, spirals, or penne). Cook the pasta according to package directions in generously salted water.
Drain the pasta and immediately mix with a liberal amount of pesto dressing while it’s still warm. Start with about a quarter cup and add more to your preference. Toss in the roasted broccoli and radishes. Finally, top the pesto pasta with extra parmesan cheese and ⅛-¼ cup of the pepitas.


Serve immediately, or refrigerate for at least one to two hours to allow the flavors to meld, and serve cold.

Whether served warm for a hearty dinner or chilled for a refreshing lunch, this vibrant, customizable pesto pasta salad is a delicious way to celebrate the bounty of late-winter and early-spring harvests. Enjoy customizing the pesto and saving the leftovers for future meals!

Seasonal Growing Tips & Greenhouse Advice
Monthly stories from our greenhouses, Growing Dome spotlights, and other gardening content
Share This

Having lived in Pagosa since 2001, I’m very familiar with Growing Spaces and have been interested in their geodesic dome design since we moved here. I got my start in gardening in the challenging conditions that Pagosa has to offer. In a previous role with the Southwest Land Alliance, I was able to contribute my graphic design services to the Geothermal Greenhouse Project, which features these unique domes. When I’m not working, I’m camping and exploring with my husband and dog, or I may be found tinkering with new creative projects like knitting or picking the mandolin. I’ve worn a lot of hats over the years and am excited now, in the spring of 2024, to be joining the marketing team and supporting the Growing Spaces community.
View full bioDownloads
Featured Categories
Seasonal Growing Tips & Greenhouse Advice
Monthly stories from our greenhouses, Growing Dome spotlights, and other gardening content
Featured Stories

How Hillside Gardens Turned a 33' Growing Dome Greenhouse Into an Event Space

The Best Greenhouse for Hail

Tried, True, and New: What Our Garden Team Is Growing This Summer

What Is The Best Automated Greenhouse Irrigation System?

Passion Flower Power: Growing Maypop Vines for Flowers, Fruit & Pollinators

Why Greenhouses Need Ventilation: Fans, Vents, Airflow & Plant Health

2026 Calendar of Events
Featured Products


Sign up for The Happy Grower Newsletter
Once a month: stories from our gardens, Growing Dome spotlights, and what's in season in Pagosa Springs.